 Blogcritics The critical lens on today's culture & entertainment
Sony Vegas Pro 12 is a full featured nonlinear editor for video from Sony Creative Software. It is designed for video post-production and multichannel audio recording and mixing. It is an integrated production environment for professional video editing, audio mixing, and DVD/Blu-ray Disc authoring. It has broad format support, robust OpenFX plug-in architecture, and workflow innovations that are meant to save you time. The goal of Vegas Pro 12 is to make it easy for you to deliver your message and express your artistic vision no matter how you work.

When you fire up Vegas Pro 12, the interface is a gray color and the layout remains much like it was in Vegas Pro 11. There are five main areas or docking panels. In the upper left side you have a Media panel that contains five default tabs; Project Media, Explorer, Transitions, Video FX, and Media Generators. If you want you can add more to fit your workflow.
The Project Media tab is where you will store all of your media files that you are using in your current project. This includes video, audio, still images, animations, as well as anything else that you may use in your project. The Explorer tab lets you search your computer to find assets.

The Transitions tab provides a wide variety of ways to blend independent clips smoothly and easily. The Video FX tabs contains things that you can use when creating your video to enhance and improve your clips. The last tab, Media Generators, contains graphical content and animations that you can use to annotate your video as well as make titles and credits.
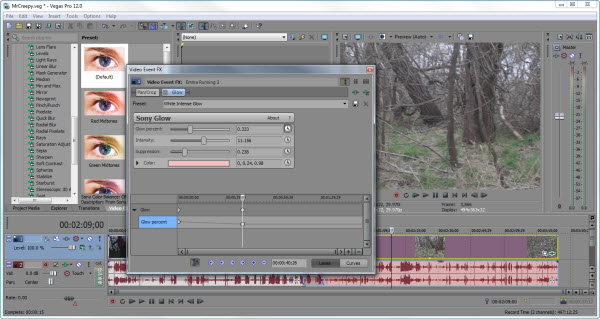
The panel on the top in the center is the media trimmer which can be used to edit video. To the right of that is the Media Preview panel which lets you view your video projects. This panel lets you see split-screen views so that when you apply your video effects, you can see a side-by-side comparison for evaluation. You can set the quality of preview in this panel as well.

On the far right is the audio level indicator which lets you work with the sound levels in your video. The bottom half of the screen is the video timeline where you will spend much of your time editing your video. It is here where you will work with your transitions, add effects, and in general, spend most of your time.
There are a number of ways to get your video into Vegas Pro. You can use the explorer tab I described above, but my preferred method is to locate the video and drag and drop it into the Project Media tab, the Media Trimmer, or the Timeline. You can also use the folder icon at the top of the interface or the File/Import from the menu.
When you set up your project you will want to set up its Properties. To achieve the best performance you will want to match the project properties to the media that you imported. So if your media was filmed in 1080p at 29.97 FPS that is how you will want to set up your project. You can always downgrade your output at a later time.

Once you place your audio or video, Vegas Pro will build the sound information for the file. This is important to note, in that you may want to put your video and sound assets into your project file subdirectory. When Vegas builds the sound information it stores it in a file wherever the audio or video asset is located. It does not move it to the project location, so if you want to back everything up, you may be looking at backing up files from several locations on your computer.
Once you are ready to edit your video, there are a couple of ways that you can accomplish this. You can drop your clip onto the Media Trimmer panel, or use the timeline. Using either method, you can cut and trim, fade in and fade out of your video as well as scrub through to locate start and end points.
Vegas Pro 12 provides a lot of tools to help you put together professionally produced videos. For example, when you need transitions between clips, you can go to the Transitions tab in the Media panel and you will find a large collection of transitions broken down by type, each with several variations. To create transitions between two clips you can put your clips together and then select a transition and drag it to the point where the clips are conjoined. From there you have quite a bit of flexibility over how that transition blends with the two clips.

As with the transitions, Vegas Pro gives you a lot of effects that you can work into your video as well. These include film effects such as various film style effects, color balance tools, film grain, blurs, sepia toning, and more. Again each one of these has several variations. You can control exactly when the effect happens by keyframing start and stop points so you have full control over your effects.
In the Media Generator tab you can also generate text effects in your video. This can be anything from subtitles to rolling credits. Again you can segment off a part of a clip and just drag and drop your selected text effect on to the segment, and then get a pop-up where you can adjust your text. There is also an Animate feature that provides several automated animation features without the need to manually keyframe.
To render your video, you go into File->Render as, where you can control aspects of rendering your video such as the output format and where you want to render it to. Sony has provided a lot of different output formats to base your video off of. You can render the whole timeline or you can set a render region to process just a portion of the video.
A new feature in version 12 is an expanded edit mode. You can double-click at the edit point to see the timeline in a detailed “A-B Roll” view. From the adjacent frames of the edit point, events can be viewed above the tracks for reference, and unused media in the events can be seen in the track area. Setting a loop region around the edit point gives you the ability to add/remove frames from either side while the media is playing.
You can also import and export a project to and from Pro Tools 10, Apple Final Cut Pro 7 and X, DaVinci Resolve 8, Premiere Pro and After Effects CS6.
The user interface has many new improvements such as a yellow border to highlight the most recently added clip, larger blue handles on the timeline to make it easier to work with the various interactive event modifiers, more comprehensive tool tips, a new toolbar icon for splitting clips, and a lot more.

To make effects and compositing easier, new shape masking tools make it easier to mask portions of your video. You can mask an effect as opposed to the image itself so that you can hide a logo, blur a person’s face or license plate, or match colors between clips using the powerful LAB color space which is especially important when trying to color-match clips filmed with different cameras.
Through the use of Layer dimensionality, you can now add the appearance of depth to graphics and video clips. This is great for creating unique looks for your film. The plug-in works especially well with text or other elements that contain an alpha transparency layer, enabling you to add realistic shadow, glow, and embossing effects.

I found Vegas Pro 12 to be very easy to work with and very professional in its capabilities. It was easy to set up and I found it to be very stable. The interface is very intuitive and almost anyone with some computer application experience can step right in and begin to use it immediately. The settings are straightforward and menus are easy to navigate.
You have a lot of features right out of the box. You can edit everything from standard definition all the way to stereoscopic 3D. The new stuff, especially the Shape Masking, FX Masking, Color Match, and LAB color space really add to the power of Vegas Pro 12. The only real limitation that I have found compared to other similar products is that it only runs on Windows 64-bit machines (Vista, 7, and 8). It does not run on the Mac.

I also like the fact that it can import from a wide variety of media formats, and you can import and export projects from other popular video editing applications. If you are looking for a video editing platform, or want to change to a new one that gives you professional results without having to lose all of your old work, then I very highly recommend Sony Vegas Pro 12.


Good review!
It is worth noting that one of the strongest parts of Sony Vegas Pro is a scripting support (based on .NET Framework). There are several scripting plug-ins, such as Vegas Production Assistant ( http://www.sonycreativesoftware.com/vegasproassist ) or Vegasaur ( http://vegasaur.com ) that significantly increase the speed of editing and take production to the next level.